Designed By Kirk
Having an effective cable management system is key to a long-term clutter-free desk setup. But minimising cable clutter can seem overwhelming. Especially if you have a fair few devices and wired accessories.
Before you decide to put this task off again, it helps to envision yourself working in your dream desk setup. And we have good news: with our growing dependence on electronic devices comes a growing number of solutions to cable management.
Whether or not it’s your first time tackling this tangly task, we hope you can find some useful tips in the step-by-step below!
Step 1: Plan

Designed By Kirk
Visualise your ideal setup then assess and determine the most efficient routing option. We listed some of the things to consider when planning your cable routes.
• Consider the types and number of cables you need to manage to determine the best tools to get.
• Take into account your device placement, cable lengths, signal reception, and accessibility for the best routing option.
• Design your system and routes with margins for future upgrades and reconfigurations.
Step 2: Choose the Right Accessories
Depending on your plan and budget, you may consider different management options for your cable.
For a quick fix, a cable management box is perfect for keeping your power strips and excess wires hidden from view. It doesn’t require much installation and you can place it behind your monitor or desk for a cleaner look. That said, a cable management box may not provide sufficient ventilation and, if not properly managed, the wires could get tangled up within.

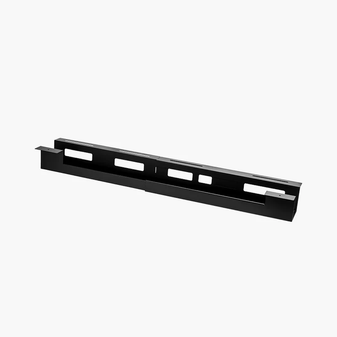
If you have a permanent or a more complex setup, investing in a cable management bar is a game changer. Cable management bars are often mounted to the inferior side of your desk. This lifts the cable off your floor and creates a cleaner look for the space. They usually come with multiple slots to accommodate various routing possibilities, and provides better ventilation and airflow than a cable management box.
You can check out this Advanced Cable Management Bar.
It is extendable up to 72", so you can reuse it if you ever decide to upgrade to a bigger desk.

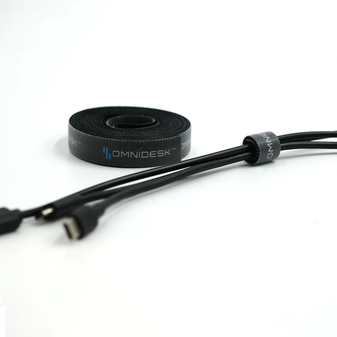
Additionally, cable raceways and cable wraps are great for concealing wires that hang aimlessly about; while a power strip is useful for congregating your cables. You will also need cable straps or cable binds to bundle up or secure your cables in place. We are all for convenience and reusability, so we would recommend getting some velcro cable binds instead of zip ties. You can also check out these cable clips to help keep your charging cables neat and within reach!
Step 3: Unplug and Organise
You will want to start with a clean slate by unplugging all cables and power strips. Remember to turn off all power switches and unplug safely. When it comes to managing unruly and tangle-prone cables, staying organised is crucial. Here’s how you can approach it:

For everyday accessory cables, we love the Maglet for its handy magnetic design.
• Label cables on both ends:
It is worthwhile to have easily identifiable cables, especially with more complex setups. Not only does it facilitate the cable routing process, it reduces the risk of you unplugging the wrong cable in the future.
• Put away spare cables and accessory cables:
Dedicate a drawer or box for your occasional-use cables. Use cable straps to separate and prevent tangling. To go a step further, you can use drawer dividers to keep them neat.
• Group cables by their types or placement:
Now that all you're left with is the main players of your setup, separate them into groups. This will make identifying and managing specific cables easier during installation or future maintenance.

Designed By Kirk
If you decide not to get any cable management system, try directly mounting a power strip to the bottom of your desk with some strong adhesive. While this method might limit further additions to your setup, it can still help you achieve an orderly appearance by lifting the cables off the floor.
Step 5: Test and conceal

Once done, give your new setup a test. If you have a standing desk, make sure the cables can extend to the height you mostly use. Make tweaks until you’re satisfied!
Lastly, for a seamless look, conceal cables with cable raceways or bundle the mass of your cable with a cable wrap.
Conclusion
Cable clutter makes even the sleekest of desk setups look unsightly. But an effective cable management system instantly elevates the look of even the plainest workspaces.
Allow yourself at least half a day for this project. While it might seem like a herculean challenge, we promise that the result is worth it. Maintaining a clean and productive workspace becomes a breeze too, saving you more time in the long run. Good luck!


